***********************************************************************
***********************************************************************
Raspberry Pi 樹莓派 使用 (USB) Webcam
***********************************************************************
Working with USB webcams on your Raspberry Pi ( fswebcam , ffmpeg )
https://raspberrypi-guide.github.io/electronics/using-usb-webcams
sudo apt install fswebcam
fswebcam --device /dev/video0 ~/images/image01.jpg
fswebcam -r 1280x720 --no-banner ~/images/image1.jpg
( fswebcam , ffmpeg 安裝成功,都可拍照片 )
https://www.sigmdel.ca/michel/ha/rpi/streaming_en.html
( mjpeg-streamer 安裝比較複雜 )
Raspberry Pi 筆記(19):Webcam 拍照與瀏覽串流媒體 ( fswebcam, motion )
https://atceiling.blogspot.com/2014/04/raspberry-pi-webcam.html
sudo apt update
sudo apt upgrade
( motion 安裝成功,可拍影片串流了! )
How to Stream Live Video Using Raspberry Pi ( motion )
https://automaticaddison.com/how-to-stream-live-video-using-raspberry-pi/
Live Cam with Raspberry Pi ( motion )
https://www.hackster.io/sushree-subhasmita-jena/live-cam-with-raspberry-pi-e9f43d
Raspberry Pi Live Streaming with USB Webcam ( ffmpeg )
https://www.dynamsoft.com/codepool/raspberry-pi-live-streaming-usb-webcam.html
( 失敗,不能拍影片 )
Secure Webcam streaming with MJPG-Streamer on a Raspberry Pi
https://www.sigmdel.ca/michel/ha/rpi/streaming_en.html
Working with Webcam using OpenCV ( python OpenCV )
7 Simple Steps: Connect Raspberry Pi to IP Cameras Easily
https://reolink.com/blog/connect-raspberry-pi-to-ip-cameras/
***********************************************************************
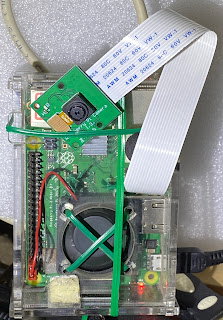
Raspberry Pi 樹莓派 使用 Camera module 相機模組
***********************************************************************
How to control the Camera Module via the command line
https://projects.raspberrypi.org/en/projects/getting-started-with-picamera/3
或
https://www.raspberrypi.com/documentation/computers/camera_software.html
拍相片
rpicam-jpeg --output test.jpg --timeout 2000 --width 640 --height 480
可以用來對焦,調焦點:
rpicam-jpeg --output test01.jpg --timeout 30000
rpicam-jpeg --output ~/Desktop/test01.jpg --timeout 30000
( 30秒 )
拍相片
- Type in the following command to take a still picture and save it to the Desktop:
rpicam-still -o ~/Desktop/image.jpg
拍相片
How to control the Camera Module via the command line
https://projects.raspberrypi.org/en/projects/getting-started-with-picamera/3
raspistill -o /home/pi/Pictures/image01.jpg
拍縮時攝影
First, create a directory where you can store your time lapse photos:
Run the following command to create a time lapse over 30 seconds, recording a photo every two seconds, saving output into image0000.jpg through image0013.jpg:
$ rpicam-still --timeout 30000 --timelapse 2000 -o timelapse/image%04d.jpg
可以用來對焦,調焦點:
rpicam-still --timeout 60000 --timelapse 5000 -o ~/Desktop/imageTL-%04d.jpg
( 每 5秒拍一張,共拍 60秒 )
拍影片
- Now record a video with the Camera Module by using the following
rpicam-vid command:
rpicam-vid -o ~/Desktop/video.mp4
I'm not using a Raspberry Pi 5
You will need to use libav
rpicam-vid -t 10000 --codec libav --libav-format mp4 -o ~/Desktop/video.mp4
Tip: The 10000 is the number of milliseconds to record
拍影片
rpicam-vid
rpicam-vid helps you capture video on Raspberry Pi devices. rpicam-vid displays a preview window and writes an encoded bitstream to the specified output. This produces an unpackaged video bitstream that is not wrapped in any kind of container (such as an mp4 file) format.
Note | When available, rpicam-vid uses hardware H.264 encoding. |
For example, the following command writes a ten-second video to a file named test.h264:
$ rpicam-vid -t 10s -o test.h264
You can play the resulting file with VLC and other video players:
On Raspberry Pi 5, you can output to the MP4 container format directly by specifying the mp4 file extension for your output file:
$ rpicam-vid -t 10s -o test.mp4
Encoders
rpicam-vid supports motion JPEG as well as both uncompressed and unformatted YUV420:
$ rpicam-vid -t 10000 --codec mjpeg -o test.mjpeg
$ rpicam-vid -t 10000 --codec yuv420 -o test.data
The codec option determines the output format
拍影片
Image and video recording with the Raspberry PI
https://raspberrypi-guide.github.io/electronics/image-and-video-recording
raspivid -o video.h264
拍 高速攝影影片
Capture high framerate video
To minimise frame drops for high framerate (> 60fps) video, try the following configuration tweaks:
Set the H.264 target level to 4.2 with --level 4.2.
Disable software colour denoise processing by setting the denoise option to cdn_off.
Disable the display window with nopreview to free up some additional CPU cycles.
Set force_turbo=1 in /boot/firmware/config.txt to ensure that the CPU clock does not throttle during video capture. For more information, see the force_turbo documentation.
Adjust the ISP output resolution with --width 1280 --height 720 or something even lower to achieve your framerate target.
On Raspberry Pi 4, you can overclock the GPU to improve performance by adding gpu_freq=550 or higher in /boot/firmware/config.txt. See the overclocking documentation for further details.
The following command demonstrates how you might achieve 1280×720 120fps video:
$ rpicam-vid --level 4.2 --framerate 120 --width 1280 --height 720 --save-pts timestamp.pts -o video.264 -t 10000 --denoise cdn_off -n
影片串流
Video Streaming with Raspberry Pi Camera
https://randomnerdtutorials.com/video-streaming-with-raspberry-pi-camera/
pi@raspberrypi:~ $ python3 rpi_camera_surveillance_system.py
http://192.168.1.110:8000/index.html
How To Stream Live Video From Your Raspberry Pi Camera
https://www.tomshardware.com/how-to/stream-live-video-raspberry-pi
raspivid -o - -t 0 -w 800 -h 600 -fps 12 | cvlc -vvv stream:///dev/stdin --sout '#rtp{sdp=rtsp://:8080/}' :demux=h264
install VLC and then open VLC.
Go to Media >> Open Network Stream, or press CTRL + N.
Enter the rtsp address and port: rtsp://raspberrypi:8080/
***********************************************************************
***********************************************************************
***********************************************************************
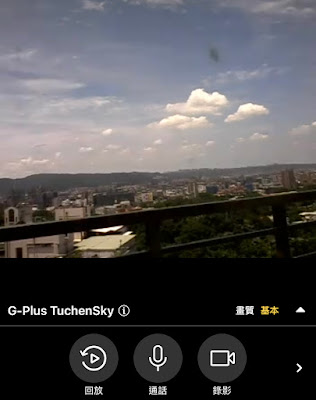
IP Camera 常用於 監視設備
IP Camera 一般是指 用 網路線,或 無線網路 Wi-Fi 連至電腦的攝影機,
比較常用於 監視設備,如:
相當好的 入門款 網路攝影機
Tapo C100 | 家庭安全防護/ Wi-Fi 網路攝影機
通常用手機觀看 監視畫面或錄影,
改機 ***
想換鏡頭,或是取消紅外線照明燈,


